
Introduction to Azure DevOps
Azure DevOps is a comprehensive suite of development
tools and services provided by Microsoft. It enables teams to plan, develop,
build, test, deploy, and manage software projects efficiently. Designed for
agile workflows, it integrates seamlessly with popular development tools and
platforms, making it a go-to choice for DevOps practitioners.
Key features of Azure DevOps include:
- Azure
Boards: Agile project management with Kanban boards,
backlogs, and sprints.
- Azure
Repos: Git repositories for version control.
- Azure
Pipelines: Continuous integration and continuous delivery
(CI/CD).
- Azure
Test Plans: Manual and exploratory testing tools.
- Azure
Artifacts: Package management for Maven, npm, and NuGet.
Whether you are a solo developer or part of a large
enterprise team, Azure DevOps provides the flexibility and scalability needed
to support your project lifecycle.
Creating an Azure DevOps Organization
Creating a new organization is the first step to getting started with Azure DevOps. To do this, you need a Microsoft account. If you don’t have one yet, you can create it during the organization setup process.
Step 1: Navigate to Azure DevOps
Go to https://dev.azure.com. You’ll see two options:
Start free: For new users without a GitHub account.
Start free with GitHub: For users who want to sign in using their GitHub account.

Step 2: Sign In or Create an Account
You’ll be redirected to the Microsoft sign-in page. If you don’t have a Microsoft account, click the Create one! link to set up a new account.
Step 3: Create Your First Project
Once logged in, you can create your first project:
Provide a name for your project.
Choose the visibility:
Private: Accessible only to selected users.
Public: Open for anyone to view and interact with.
Click Continue to create the project.
At this stage, a new organization is automatically created along with the project.

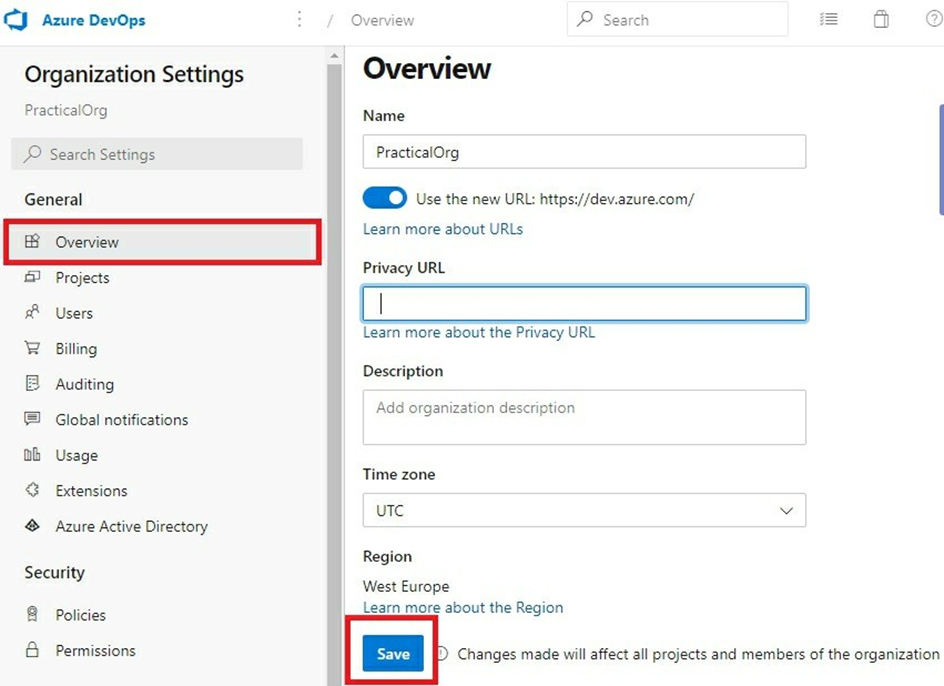
Step 4: Change Organization Name
Navigate to the Azure DevOps homepage by clicking the logo.
Select Organization settings from the bottom-left corner.
Under Overview, update your organization name and click Save.
Confirm the changes by typing the new organization name in the dialog box.

The new URL for your organization will follow the format: https://dev.azure.com/{org.name}. For example: https://dev.azure.com/practicalorg.
Key Organizational Settings
Azure DevOps provides several settings to customize and manage your organization effectively. Let’s explore the most commonly used ones.
1. Projects
View all projects in the organization.
Create, rename, or delete projects.
Search for existing projects.

2. Users
View all users in the organization.
Add new users by clicking Add users:
Enter the email address of the user.
Assign an access level (e.g., Basic for free users).
Specify the projects the user can access.
Send an email invite to notify the user.
Note: Free plans allow up to 5 Basic users.


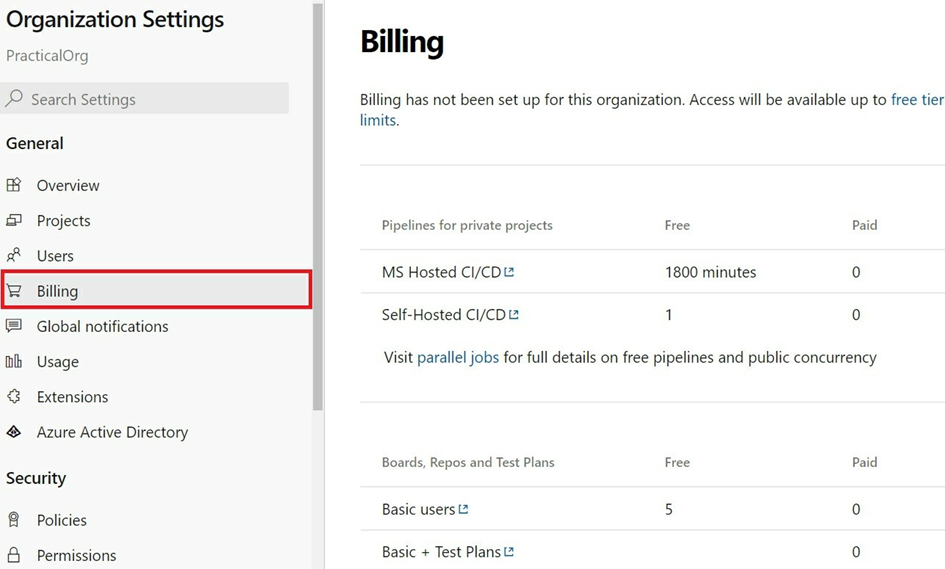
3. Billing
Manage billing details.
Free plan includes:
1,800 (30 hours) Microsoft-hosted CI/CD pipeline minutes per month.
1 self-hosted CI/CD pipeline.
2 GB of storage for Artifacts.
4. Extensions
Add tools and features to your projects via the Azure DevOps marketplace.
Example: Install a time-tracking extension like "Timetracker."

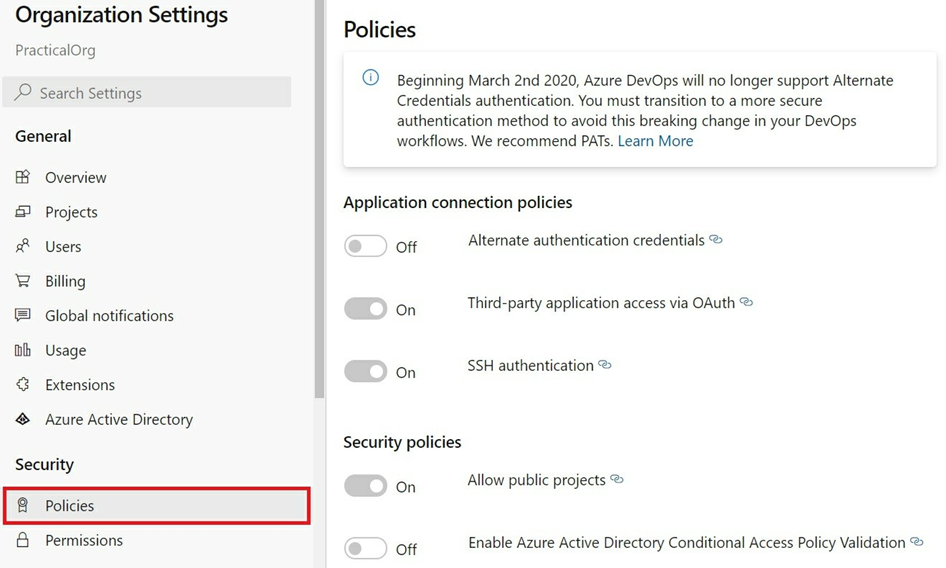
5. Security Policies
Configure organizational security settings.
Example: Disable public projects by turning off Allow public projects.
6. Permissions
Assign permissions to groups or individual users.
Control access to tasks such as creating or deleting projects.

7. Work Item Processes
Customize workflows for your organization.
Create inherited processes for tailored needs.

Summary
You’ve now set up your Azure DevOps organization and created your first project. Additionally, you explored important organizational settings to customize your experience. In the next part, we’ll dive deeper into creating and managing projects within Azure DevOps.


